鼠标减速拖动
在做滑动验证码处理时,需要能像人操作一样,鼠标快接近终点时越来越慢,这里就需要有一个鼠标减速拖动的方法了
看了一下,论坛里暂时还没有相关的内容,就分享一下实现方法
要实现减速需要有一个方法能设置正负加速度并使“速度 / 时间” 图像的积分等于需要滑动的距离,之前逛 CSDN 的时候发现一篇帖子提到类似方法:https://blog.csdn.net/panyuteng/article/details/82690403,其中的减速代码如下:
def get_track(x1,x2,y2):
    """
    根据偏移量获取移动轨迹
    :param distance: 偏移量
    :return: 移动轨迹
    """
    distance = x2 - x1
    track = []  # 移动轨迹
    current = 0  # 当前位移
    mid = distance * 3 / 5  # 减速阈值
    t = 0.2  # 计算间隔
    v = 0  # 初速度
    while current < distance:
        if current < mid:
            a = 2  # 加速度为正2
        else:
            a = -3  # 加速度为负3
        v0 = v  # 初速度v0
        v = v0 + a * t  # 当前速度v = v0 + at
        move = v0 * t + 1 / 2 * a * t * t  # 移动距离x = v0t + 1/2 * a * t^2
        current += move  # 当前位移
        track.append(move)  # 加入轨迹
    return track
这种写法较为简单,循环部分的条件设置会造成最终的移动距离大于实际需要的距离从而使滑动失败,在尝试自己写算法的时候发现网上有个库已经提供了比较好的实现 😝(轮子大法好)
首先需要安装第三方库 pyautogui 库,不会使用 pip 工具或者嫌安装速度较慢的可以参考这篇帖子:http://support.i-search.com.cn/article/1542091774538
pyAutoGui 类似于 selenium,但更为出色的是它具侧重模拟用户的键盘,键盘,截图,消息框的操作,具有显示轨迹特效,更贴近人类行为操作的第三方库
这是官方文档:https://pyautogui.readthedocs.io/en/latest/,英语比较好的可以自己读一下
这里我们主要用到的是其中的 dragTo 方法,官方给出的使用方法如下:
假设我们需要从位置(100,100)减速拖动到(500,200),可以这么写:
import pyautogui

pyautogui.moveTo(100, 100, 2)  # 最后一个参数2意思是花两秒钟从鼠标当前位置移动到(100,100)
pyautogui.dragTo(500, 200, 2, pyautogui.easeOutQuad)  # easeOutQuad是减速方法
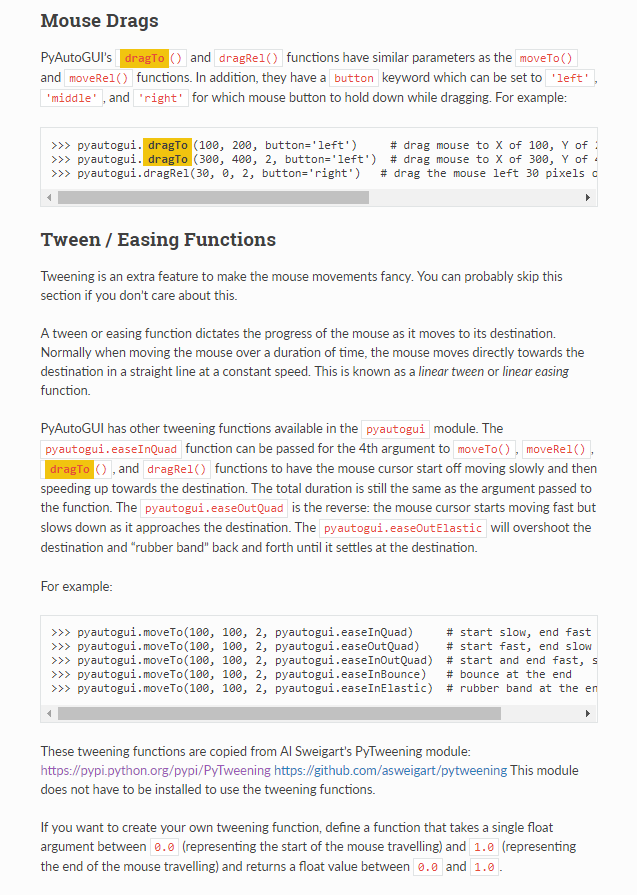
官方还给出了easeInQuad,easeInOutQuad,easeOutBounce,easeOutElastic等方法,分别对应加速、先加速后减速、小球落地反弹、皮筋式摆动,可以自己尝试
如果只是想使用的话看到这里就可以了,如果想深入了解一下原理可以继续往下看
dragTo 主要调用了自带的 _mouseMoveDrag() 方法,代码如下:
def _mouseMoveDrag(moveOrDrag, x, y, xOffset, yOffset, duration, tween=linear, button=None):
    assert moveOrDrag in ('move', 'drag'), "moveOrDrag must be in ('move', 'drag'), not %s" % (moveOrDrag)

    if sys.platform != 'darwin':
        moveOrDrag = 'move' # Only OS X needs the drag event specifically.

    xOffset = int(xOffset) if xOffset is not None else 0
    yOffset = int(yOffset) if yOffset is not None else 0

    if x is None and y is None and xOffset == 0 and yOffset == 0:
        return  # Special case for no mouse movement at all.

    startx, starty = position()

    x = int(x) if x is not None else startx
    y = int(y) if y is not None else starty

    # x, y, xOffset, yOffset are now int.
    x += xOffset
    y += yOffset

    width, height = size()

    # Make sure x and y are within the screen bounds.
    x = max(0, min(x, width - 1))
    y = max(0, min(y, height - 1))

    # If the duration is small enough, just move the cursor there instantly.
    steps = [(x, y)]

    if duration > MINIMUM_DURATION:
        # Non-instant moving/dragging involves tweening:
        num_steps = max(width, height)
        sleep_amount = duration / num_steps
        if sleep_amount < MINIMUM_SLEEP:
            num_steps = int(duration / MINIMUM_SLEEP)
            sleep_amount = duration / num_steps

        steps = [
            getPointOnLine(startx, starty, x, y, tween(n / num_steps))
            for n in range(num_steps)
        ]
        # Making sure the last position is the actual destination.
        steps.append((x, y))

    for tweenX, tweenY in steps:
        if len(steps) > 1:
            # A single step does not require tweening.
            time.sleep(sleep_amount)

        _failSafeCheck()
        tweenX = int(round(tweenX))
        tweenY = int(round(tweenY))
        if moveOrDrag == 'move':
            platformModule._moveTo(tweenX, tweenY)
        elif moveOrDrag == 'drag':
            platformModule._dragTo(tweenX, tweenY, button)
        else:
            raise NotImplementedError('Unknown value of moveOrDrag: {0}'.format(moveOrDrag))

    _failSafeCheck()
里面生成 steps 坐标的循环一共有屏幕像素中较大值那么多次,比如电脑分辨率是 1920*1080,那么就会生成 1920 个坐标,因此加速减速都看起来十分流畅。
减速部分的代码是这样:
steps = [getPointOnLine(startx, starty, x, y, tween(n / num_steps)) for n in range(num_steps)]
核心算法有两个,getPointOnLine 和 tween,其实都是 pyautogui 库调用的 pytweening 这个库里面的方法
① getPointOnLine 方法主要做的是在起点 (startx, starty) 和终点 (x, y) 之间根据 tween(n / num_steps)这个比例获取一个位置坐标
② 减速方法将 tween 设置为 easeOutQuad,这个方法接收 0-1 之间的数字并输出 0-1 之间的数字
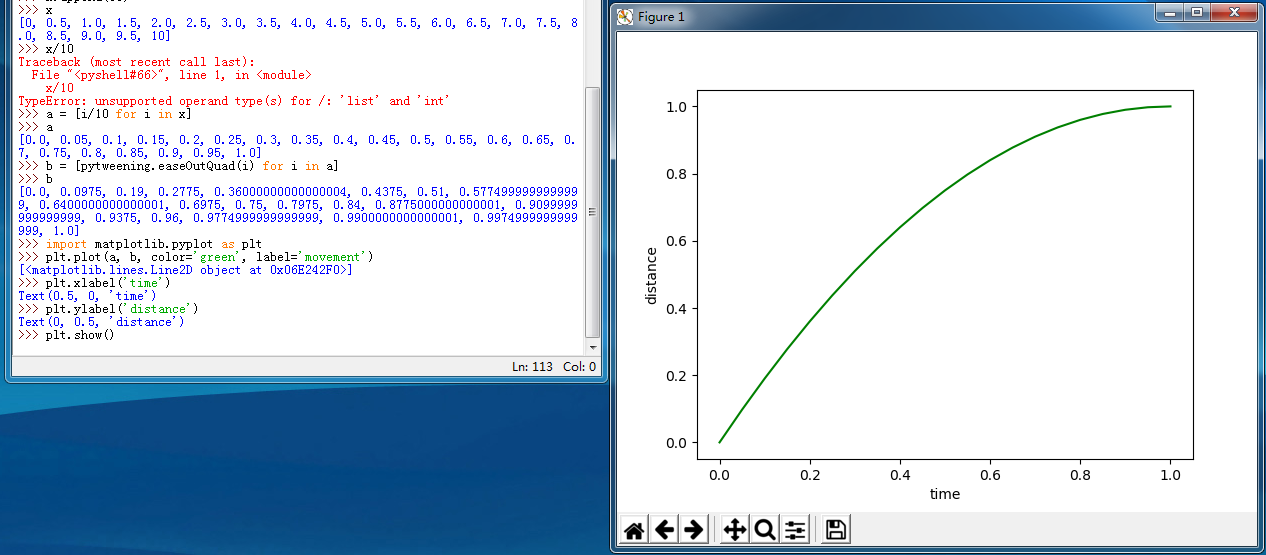
具体算法先不深究,我们根据函数画出时间路程图像
图像斜率为速度的值,可以看到一开始是匀速运动,后来逐渐减速至 0,因此生成 steps 坐标以后可以达到鼠标减速拖动的效果


过奖啦 😄
高手啊。
不明觉厉啊
习惯很好,天天加班还不忘技术分享
👍🏻对 Python 很熟哇